I'm having trouble picking a color scheme for these heroic "Astro Guards" I've been working on for Star Schlock. I knocked together some quick color studies to compare them, but still can't settle on one. Do you have a preference?
Thanks for helping me decide!
Showing posts with label Painting. Show all posts
Sunday, September 8, 2019
Saturday, March 5, 2016
Basing Tutorial: How I Base My Wargame Figures
One of the visitors to my blog left a comment asking for an explanation of my basing technique. I don't think I do anything special regarding basing, but I'm happy to oblige in case it helps!
To level out the difference in height between the figures cast base and the wood base I put a lot of glue around the edge of the cast base and spread a thinner layer around the figure's feet.
While the glue is wet shove it in a box of sand. Shake off the excess.
Check to make sure no extra bits of sand are glued to the figures feet.
Let the glue dry overnight.
After the base dries, I drybrush with a 50/50 mix of Raw Sienna and Spicy Mustard. For bases depicting arid regions I use more Spicy Mustard, or add a second light drybrush of Spicy Mustard.
I add a final light drybrush of 50/50 Raw Sienna and Sand, just trying to pick out the sharp edges of stones and give the base a general dusting of light color.
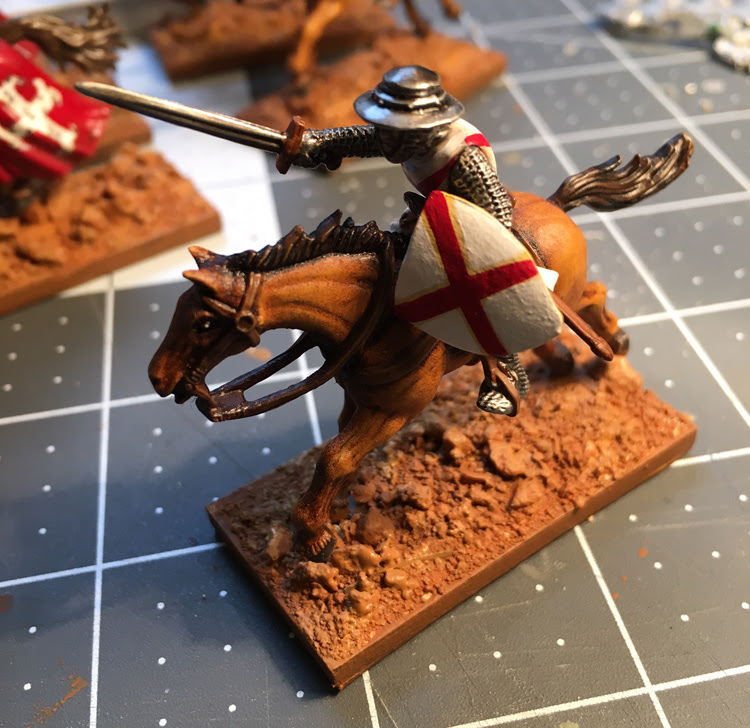
I also start working in some of the basing colors into the parts of the figure close to the grown. Here I drybrushed the bottom of the horse covering with the mix of Sand and Raw Sienna to represent dried mud or dust.
Next I choose a few Tufts
and place them in the biggest patches of glue.
Finally I dab pinches of static grass
onto the base.
And that's it! I final coat of matte overcoat and the figure is ready for battle!
Materials
- White (PVA) Glue
- Sand (I picked up a lifetime supply of playground sand from the hardware store. I'm considering sifting out the largest grains or finding a finer grain source)
- Cheap Paint. I use three shades of Americana craft paint: Raw Sienna, Spicy Mustard and Sand.
Technique
After gluing the figure to its base and waiting for it to dry, I start by coating the base liberally with white glue.To level out the difference in height between the figures cast base and the wood base I put a lot of glue around the edge of the cast base and spread a thinner layer around the figure's feet.
While the glue is wet shove it in a box of sand. Shake off the excess.
Check to make sure no extra bits of sand are glued to the figures feet.
Let the glue dry overnight.
Painting
Paint the sand base with Raw Sienna/Medium Brown. The paint helps affix the sand to the base, so coat it thoroughly.
After the base dries, I drybrush with a 50/50 mix of Raw Sienna and Spicy Mustard. For bases depicting arid regions I use more Spicy Mustard, or add a second light drybrush of Spicy Mustard.
I add a final light drybrush of 50/50 Raw Sienna and Sand, just trying to pick out the sharp edges of stones and give the base a general dusting of light color.
I also start working in some of the basing colors into the parts of the figure close to the grown. Here I drybrushed the bottom of the horse covering with the mix of Sand and Raw Sienna to represent dried mud or dust.
Ground Cover
The drybrush coat isn't wet for long, so after I finish painting a batch of bases I quickly move into ground cover. I spread a few lines of white/PVA glue onto the base, and use a toothpick to work it into cracks and crevices. I aim to leave about 50% of the ground untouched by glue (I like the contrast between ground cover and bare earth). For arid regions I'd cover 25% or so.
Next I choose a few Tufts
Finally I dab pinches of static grass
And that's it! I final coat of matte overcoat and the figure is ready for battle!
Sunday, May 3, 2015
Back with Reaper Bones Marsh Trolls
I took a diversion into nostalgia by picking up a dozen old Rogue Trader figures but after stripping, cleaning, reassembling and customizing those old beakie marines I didn't have the steam left to paint them up. Recognizing the signs of hobby burn out I took a little break until my painting juices got flowing again. Happily, I got the urge to paint again just a few weeks later and used my fresh enthusiasm to knock out a few Reaper Bones figures from the first kickstarter.
Most of the Marsh Troll paint jobs I've seen color them green, but I wanted to give them a bit of contrast when they take the field next to my green snake and lizardmen. I gave them a coat of Folk Art mustard yellow and then various washes of Army Painter and Winsor & Newton
The swamp plants are bits snipped from some decorative plastic greens I found at the local craft store. On such a large base could probably add quite a bit more foliage, but I was hesitant to obscure too much of these monsters.
I also knocked out a few more female "player characters": a paladin and a halfling. I'm definitely noticing both the strengths and weaknesses of the Bones material. The plastic is extremely cost effective, but on small, man sized figures I've run into a number of obscured details. Noseless faces, shallow detail, and difficult to remove mold lines make Bones less than ideal for hero characters. For large creatures or monsters (who might look more vicious sans nose), Bones are fine, but I think I'll be sticking to metal or hard plastic for man sized figures in the future.
Wednesday, August 13, 2014
I painted some panzers
In preparation for tackling the steam tanks from the All Quiet on the Martian Front starter set I picked up at Historicon, I decided to get some practice on half a dozen Zvezda tanks from my lead pile. Only problem? I've only painted one or two tanks ever, and that was a decade ago.
Zvezda Panzer II
I can whip out a dozen Romans with one eye cocked at the TV, but working through these tanks has proved quite a challenge. During every step of the process I've had to read up on tutorials, check YouTube videos, and experiment with various paints, pigments, and powders. My initial stab at several soviet tanks ran into trouble, so I switched to a pair of Zvezda Panzer IIBuilding them was a breeze, and they received a coat of black primer, followed by some Plastic Soldier Company panzer gray. I experimented with modulation highlights using a new Iwata airbrush
I picked out details and crevices with a thinned wash of black ink and applied some decals from I-94 (I was too timid to try and apply turret numerals, as there didn't appear to be enough room). I used dark brown/black paint applied with a sponge to simulate chipped paint (I may have gone a bit overboard), and then dusted the tanks with Mig pigments
It took quite a while, with a lot of trial and error along the way, but I certainly feel I've got a better handle on armor modeling. And look at these tiny Zvezda panzers, they're just adorable.
Monday, July 14, 2014
Painting a Reaper Bones Cthulhu
I painted up Reaper Bones Cthulhu for my dungeon bash, but kept my progress under wraps to avoid spoiling the surprise for any players who might visit this site. This is by far the largest miniature I've painted, and I wasn't quite sure how to proceed. I researched what others had done when tackling their gargantuan elder gods, and settled on using a series of layered ink washes.
I gave Cthulhu a base of black and then heavily drybrushed it with gray and white.
I only had small bottles of GW and Army Painter washes which wouldn't be nearly enough for his noodley eminence, so splurged on a set of Winsor & Newton inks
With a deadline approaching I finished Cthulhu up with some vibrant pink tentacles and a quick green/gray drybrush to the base.
He was a bit intimidating to start but I'm eager to tackle some other large figures now that I've got this ink wash technique down.
Saturday, August 10, 2013
Painting Reaper Bones for Newbies: Skeletons
I'm getting started with the Skeleton warband. My tips for getting started painting Reaper Bones after the jump.
Thursday, July 11, 2013
Testing Techniques for Painting Horses
Oh horses, why do you vex me so? I've found cavalry to be an essential branch of the ancient and medieval armies I'm painting up. They typically have dynamic movement capabilities and impressive combat stats in game, and a large mass of cavalry figures looks impressive. But I still can't find any enthusiasm for painting up that much horse flesh.
In an effort to determine the quickest way of painting up mounted troops, I tried out three different techniques on some Conquest Miniatures Norman cavalry. Painting to wargame standard, I wanted to compare the final product with regards to the time and effort required to complete the paint job. My horses after the jump.
Saturday, May 18, 2013
I Need Miniature Paint Brush Recommendations
I've been painting miniatures for a long time, but never paid much heed to the brushes I used. Paint, figures, even basing material and terrain all received my careful attention, but I became accustomed to picking up some cheap brushes from the local arts & craft store and replacing them once they lost their tip (typically within a month or two).
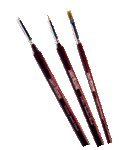
Last year I picked up an Army Painter Brush Set
and was surprised at what a difference using a dedicated set of miniature painting brushes made. The Army Painter set included a "Standard Hobby Brush" which I assume is size 1, and a smaller "Hobby Detail Brush" (size 0?) and a flat tipped "Drybrush" brush. The Standard Hobby Brush became my work horse, with the Detail Brush helping out with facial highlights, edge highlights, piping and shield patterns. After a year of use (far better than my usual cheapy brushes) the Army Painter "Standard Brush" is kaput, its tip frayed and splayed. It's time for a replacement.
Coincidentally, Monty at Twin Cities Gamer happened to mention how happy he was with his brushes. I was all set to pick up his favorites, a Raphael Kolinsky Sable size 0
and Raphael Kolinsky Sable size 1
when I read a comment to his post suggesting a Winsor & Newton Series 7 Kolinsky Sable size 0
and Winsor & Newton Series 7 Kolinsky Sable size 1
. I'd heard of Winsor & Newton from miniature painters before, but really hadn't put much thought or research into them.
So fellow painters, what do you recommend?
Last year I picked up an Army Painter Brush Set
Coincidentally, Monty at Twin Cities Gamer happened to mention how happy he was with his brushes. I was all set to pick up his favorites, a Raphael Kolinsky Sable size 0
So fellow painters, what do you recommend?
Saturday, December 29, 2012
28mm Ancient Iberians by Crusader Miniatures
| Crusader Miniatures 28mm Ancient Spanish |
After the trouncing my gauls received in my last Hail Caesar game, I decided it was time to reinforce them with some of the allies I had atop the lead pile. I'm aiming for a full Carthaginian army to oppose a Republican enemy, but with my interests ping ponging between periods, this Punic Wars project is going to take a few years to complete. Take a look at the color scheme I worked out for my ancient Spanish after the jump.
Saturday, September 1, 2012
Dark Ages Color Palettes
I've been noodling the idea of starting the Dark Ages / Norman Conquest / Normans in Italy / 1st Crusade period, but since it's on the back burner I'm taking my time and planning out how I want to tackle Yet Another Period. I read some really good posts on Model Dad's blog about dark ages dying techniques and color schemes. Using that as a base, I've decided to work out the color schemes for the various armies I might be painting up for my 10th - 12th century Normans, Anglo-Saxons and Vikings. This is a pretty massive post where I go into historic dyes, hobby paint equivelants, color schemes, and samples. All this and more after the jump.
Wednesday, August 15, 2012
Doctor Fausts' "How to Paint Horses"
I bookmarked this video tutorial about painting 28mm wargame horse some time ago and just got around to watching it. I've been using a staining method in which I apply a base coat, then a dark oil overlay which I wipe off with a rag. It's fast, and honestly, I really didn't quite know how to handle the "large rounded surfaces" mentioned in this video.
The multi layer technique is probably too time consuming for churning out mass quantities of cavalry, but I'm going to try it for the next mounted general or hero I tackle. Lots of great tips, and watching painting techniques is so much easier than trying to learn a painting process from still images and written descriptions.
Subscribe to:
Posts (Atom)