

My game group is eager to get started on some Caribbean pirate action with Blood and Plunder, but we're sorely lacking in appropriate terrain. We assembled some Spanish style resin buildings, but the pine trees, oaks and other temperate vegetation I have just won't cut it for swashbuckling adventures across the Spanish Main.
Check out my method for creating dense jungle terrain after the jump.
There's a pretty common solution to creating jungle terrain for miniature games; "Aquarium plants, glue to base, job's done!", but I've never been thrilled with the outcome. The leaves always look too large, the plants too shiny and plastic, and while they'll do in a pinch I was hoping to create something that was a bit more realistic.
I also wanted to capture the look of the jungle for the types of games I anticipate running: generally coastal raids or beach assaults in the Caribbean, South East Asia, the Pacific or Scariff. The jungle near shores seems denser to me than the deep rainforest where the forest canopy blocks out light to the floor, restricting undergrowth. Coastal forests seem thicker, and heaped with fronds, undergrowth, vines and creepers.
 |
| Hoping to replicate this type of coastal jungle with two stands of terrain on a sand/beach terrain mat. |
Rather than create jungle stands with open spaces models would move through, I've opted for dense terrain models will move around. The space between these stands will serve as game trails or areas of less dense vegetation.
 |
| Two dense stands of jungle foliage separated by a game trail models could pass along. |
Gathering the Materials
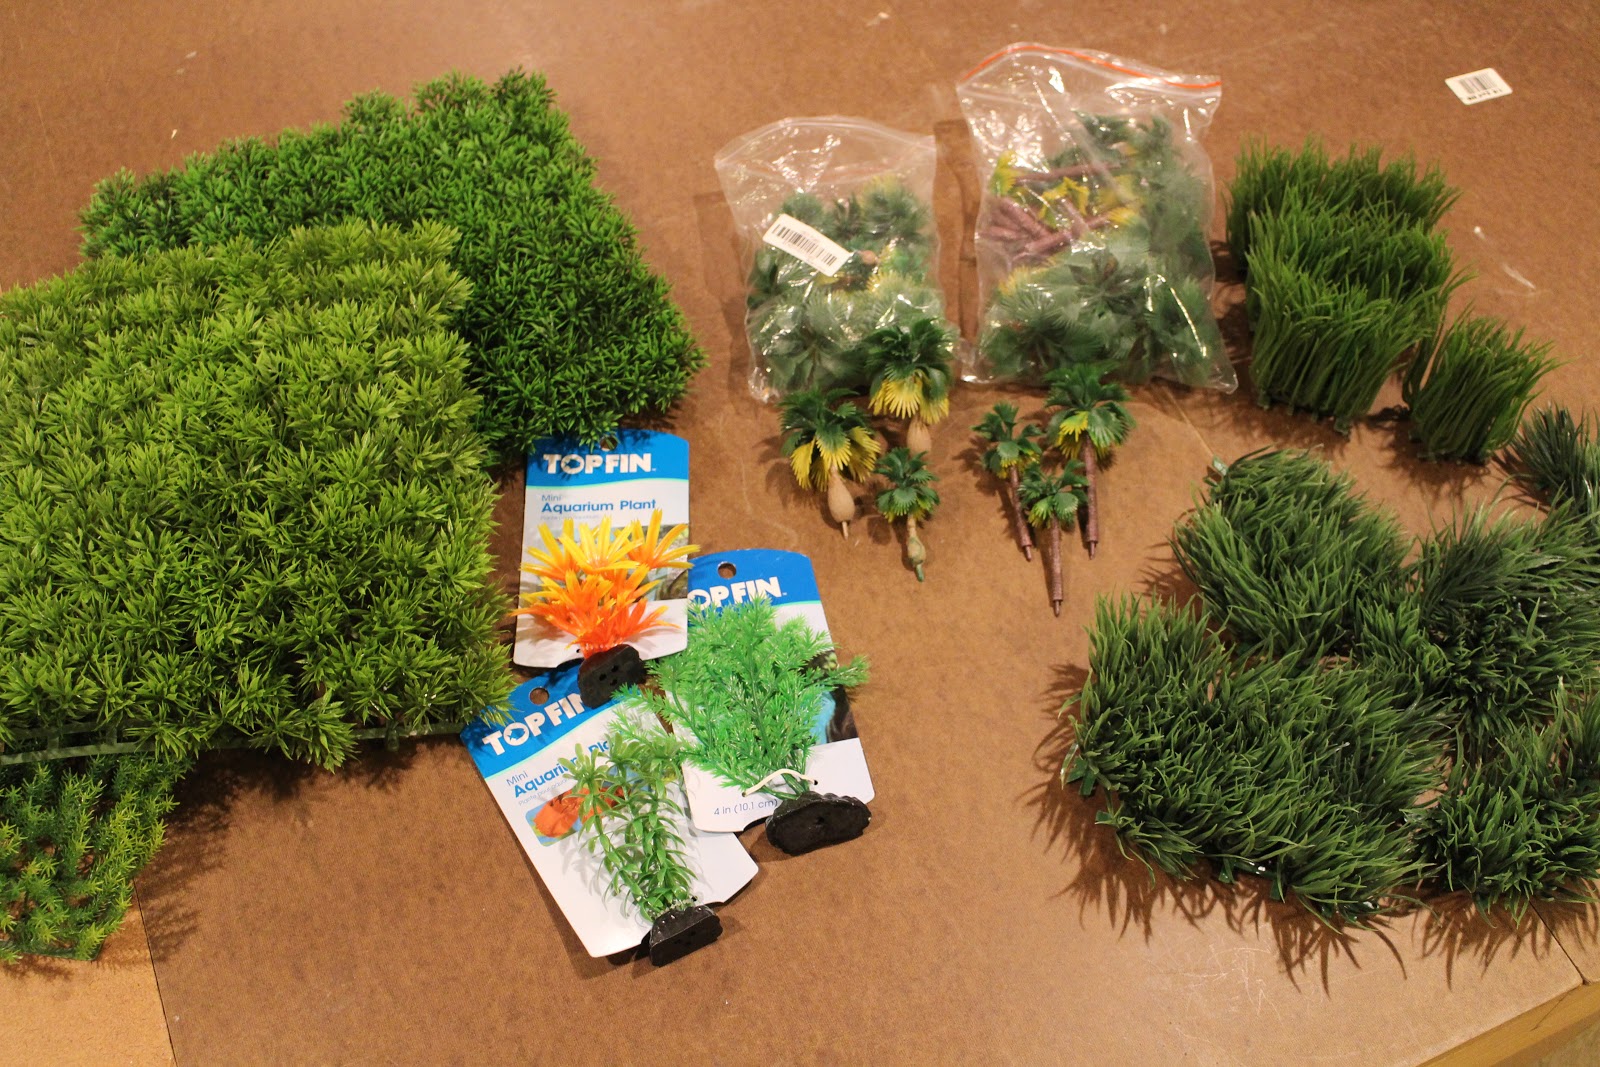
I started by gathering a variety of plastic plants from the craft store. Most of these came as thick mats of individual "bushes" attached to a flexible grid of rubbery plastic. I also stopped by the pet store and grabbed some aquarium plants that were on sale, but most of the aquarium decor featured plants with leaves I felt would look out of scale next to our 28mm models.
I also ordered two varieties of palm trees and had some pink insulation foam on hand from other projects.
Materials List
- Palm Tree Type A
- Palm Tree Type B
- Three mats of artificial plants roughly 12 inches square. (Not exactly what I used, but something like this)
- Aquarium plants (although in future builds I would skip using these)
- Woodland scenics clump foliage: Medium Green
- Woodland scenics clump foliage: Light Green
- Hot glue gun
- Mod Podge or white/PVA glue
- Dense insulation foam (pink in the US, blue elsewhere. From hardware/DIY stores)
- Black gesso
- Dark green spray paint
- Light green spray paint
- A variety of craft paints in brown, yellow, and green
- Brushes for drybrushing
Preparing the Materials
First step was to bring the plant colors towards something more realistic. The aquarium decorations were the worst offenders, but even the craft store mats and hobby palms were a bit shiny and overly bright.For the vegetation mats, I flipped them upside down and sprayed them with dark green on the bottom and sides. Once dry, I flipped them back over and sprayed light green across the tops of the shoots and leaves. Because the mats are affixed to a flexible rubbery grid, I could bend it to expose every bit of each "bush" to my rattle can.

Once the spray pains were dry, I dry brushed the leaf tips with a variety of yellows, browns and greens to give some variety to the vegetation.
For the palm trees, I disassembled them, painted the trunks flat brown and then masked the trunks with masking tape. I reassembled the fronds, sprayed them with dark green, and then went back and sprayed the underside of the fronds brown, and dusted the tops of the fronds light green.
The fronds lower on the tree tend to be older or dead, so I gave them a drybrush of brown and yellow. The trunks also got some light brown dry brushing to accentuate the grain of the wood.
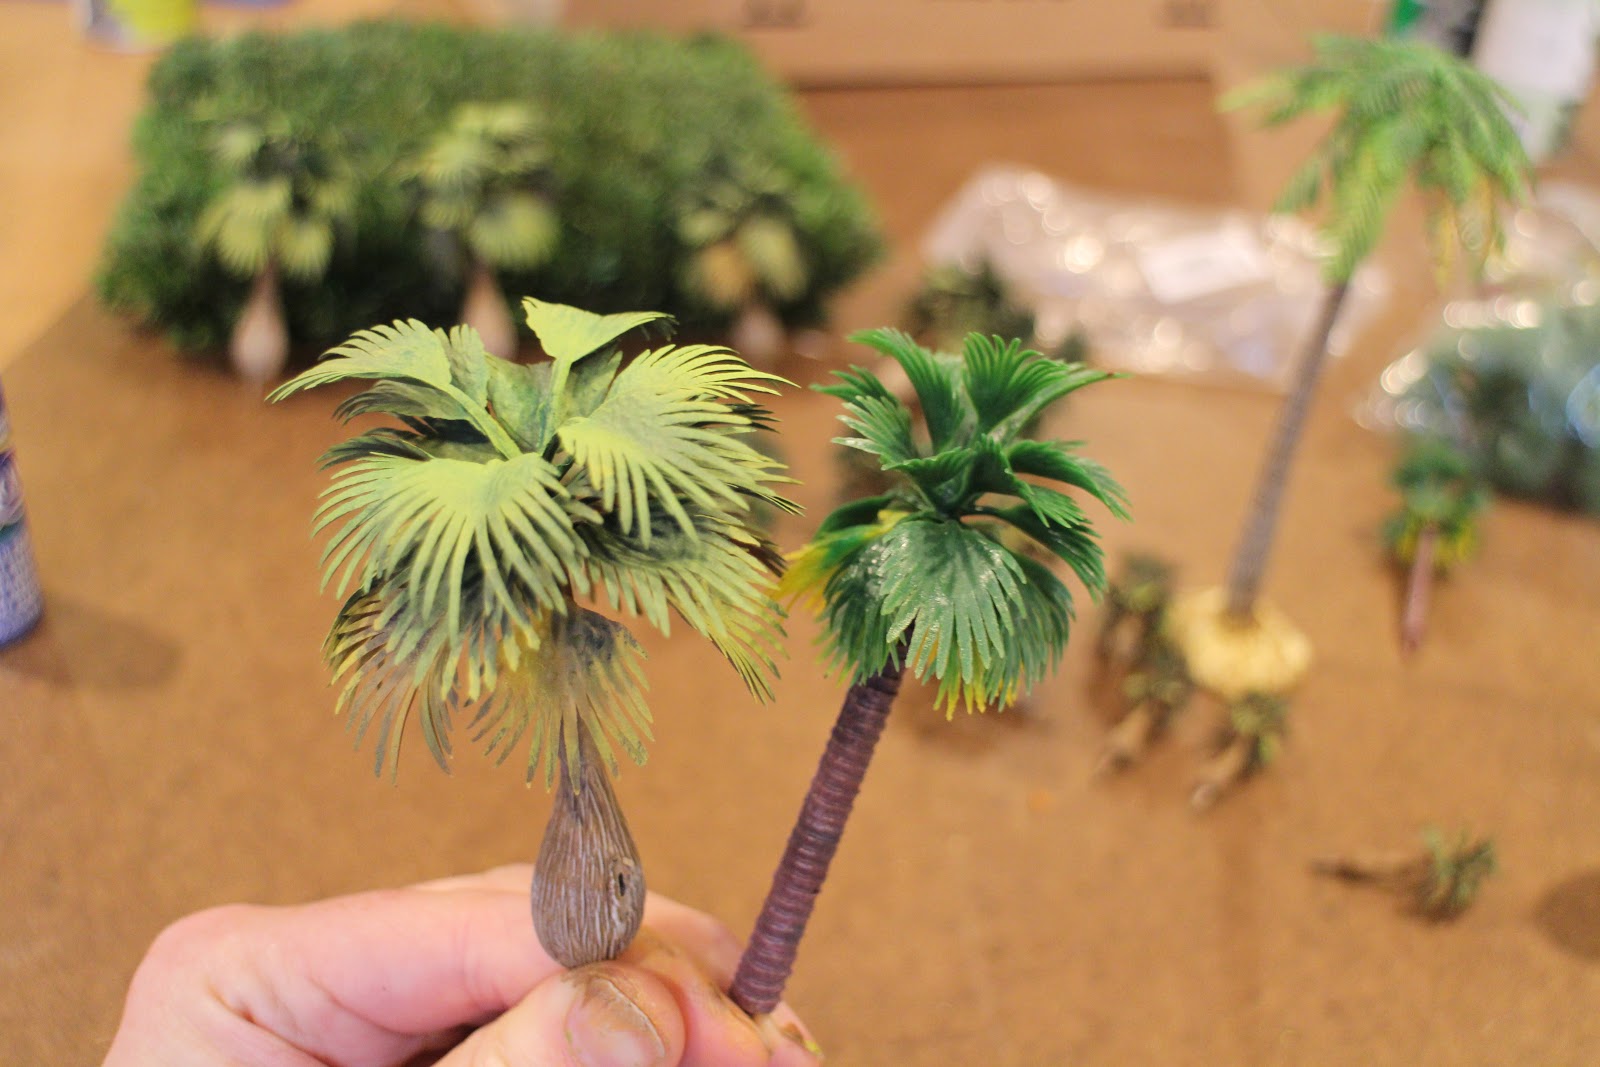 |
| An original unpainted palm tree (R) compared to my painted version (L) |
The aquarium plants got a similar treatment. Below you can check out a comparison photo to see how the colors subtly shifted after painting.
 |
| The plant materials in their original colors |
 |
| After painting |
Finally, to give my plants something to cling to, I cut my pink foam into chunks. Each was shaped like a small hill to add additional height to each jungle stand. I gave them a coat of black gesso as primer.

and then a coat of browns and greens as a base layer in case there were gaps in the vegetation I intended to glue on top.

Assembling the Jungle Terrain
With my preparation complete it was time to begin assembling the stands. I selected a few palm trees for each piece, hot glueing them to the tallest point of each foam base.
I pulled off some of the individual bushes from each rubber frame and cut pieces of the aquarium plants apart for undergrowth.

Starting towards the top of the stand near the base of each tree, I began hot gluing individual bushes to the foam base, working my way towards the bottom so they overlapped and covered gaps between each bush.
 |
| The "back" of one jungle stand after completing one side. |
After covering the entire base with jungle bushes there was a gap in plastic foliage along the base line of the stand where it would sit on the table. To conceal it, and to fill a few gaps between plastic bushes, I hot glued clumps of Woodland Scenics foam foliage into the gaps.


Each stand took about an hour to create. I put my son to work creating some scatter terrain with the leftovers and I'm hoping to create additional low "hedge" style stands but I'm a bit jungled out at the moment.

The Final Products


Along with single based palm trees and some other terrain I've already completed, I'm pretty happy with the final jungle stands. They are dense, fill a good portion of the table and look pretty good and I'm hoping they work as well in play!
Wow! That all looks brill!
ReplyDeleteThanks!
DeleteA triumph Sir!
ReplyDeleteThanks Michael!
DeleteJust out of interest John, may I ask where you got your backdrop from? Or is that actually the view from your front room? Either way, it is mightily impressive.
DeleteThat's just a bit of Photoshop trickery. The blank wall behind the house in the first photo looked a bit dull, so I added a backdrop.
DeleteVery nicely done John, really impressive.
DeleteExcellent. The best looking jungle scenery I have seen for a while.
ReplyDeleteYou are too kind!
DeleteBrilliant work, seriously impressed (and looking hard at my jungle terrain - the density of yours is very appealing)
ReplyDeleteThanks Kevin! Funnily enough, I'm looking at creating some less dense terrain next to provide some additional variety to mine :)
DeleteClearly a big effort but certainly worth it. They look superb and make me want to revisit mine!
ReplyDeleteThanks Michael! It was tough delaying painting miniatures for the several weeks it took to complete this project, but I'm on a tear to improve my terrain collections.
DeleteGreat stuff...and handy tips!
ReplyDeleteThanks Gordon, hope they come in handy!
DeleteWonderful. Thanks for the detailed description about how to make the terrain. I find that very useful. Cheers, Karl
ReplyDeleteVery good! I would like to do something similar myself.
ReplyDeleteSuperb tutorial!
ReplyDeleteAmazing! Love it.
ReplyDeleteGreat tutorial and you made out building look great
ReplyDeletehttp://brigadegames.3dcartstores.com/SpanishCaribbean-Style-2-story-building-with-shutters_p_3742.html
Best jungle I've seen - excellent work and I'll add beautiful terrain/minis in general.
ReplyDeleteFrank
http://adventuresinlead.blogspot.com.au/
Ace Cool Looking Jungle Jumble! I like the look of it too. I often catch an outgoing wave on the internet and scrounge cheap plastic planting mats too.
ReplyDeleteWell done. BB
Wonderful tutorial! Just the kind I was looking for to make my own jungle terrain look better! Thanks!
ReplyDeleteQuick question: The mat in the last couple of photos, is it printed or flocked? If the former, who sells it, if the latter, did you make it? Thanks!
ReplyDeleteThat is a fleece mat I made using Wal-Mart's "custom fleece printing" feature. I purchased a terrain graphic from Wargames Vault, uploaded the image to the Wal-Mart site, had it printed and shipped to me. The whole thing was about the same price as one of the commercial wargame mats, but I got to pick exactly the image I wanted.
DeleteHi, sorry for the necro question, but I've done something similar with plastic bushes and I found the paint flaked off very quickly afterwards. I was using army painter acrylic sprays and I washed the plants in soapy water first (and let them dry).
ReplyDeleteWhat spray did you use?
Hi Dave! For the green paint I used two shades of spray paint I picked up from Michael's craft store. They aren't specific hobby paints, but I don't suspect they are that different from Army Painter sprays.
DeleteI don't think I primed them first, but it's possible. If I primed them, I would have used Army Painter brown. Perhaps your initial coat was too thick? I'm pretty sure I did a few light coats. I also went back and did some drybrushing of brown and yellow.
That sucks your paint is flaking. I know how frustrating that is! Hope you are able to figure out a solution. Good luck!