
After finishing up my latest batch of Romans I was eager to get them on the table. Rather than pull out my trusty Hail Caesar rules though, I decided to christen them with "To the Strongest", Simon Miller's new diceless, grid based wargame. Check out our first stab at the rules after the jump.
I read through the rules and gathered my trusty
Setting Up
"To the Strongest" requires a grid to handle movement and distances. I whipped up some simple grid markers and laid out an 8 x 12 box grid on my table. I was initially skeptical of the grid, but I bought into Miller's explanation that it helps keep battle lines linear so they meet head on as likely happened in actual ancient battles. |
| The tan piles of stones mark grid corners. They blend in enough to be inconspicuous among the other table scatter. |
I pulled out some terrain and followed "To the Strongest's" terrain generation system to quickly randomize my initial terrain placement, prepped a pair of decks of playing cards and was ready to go.
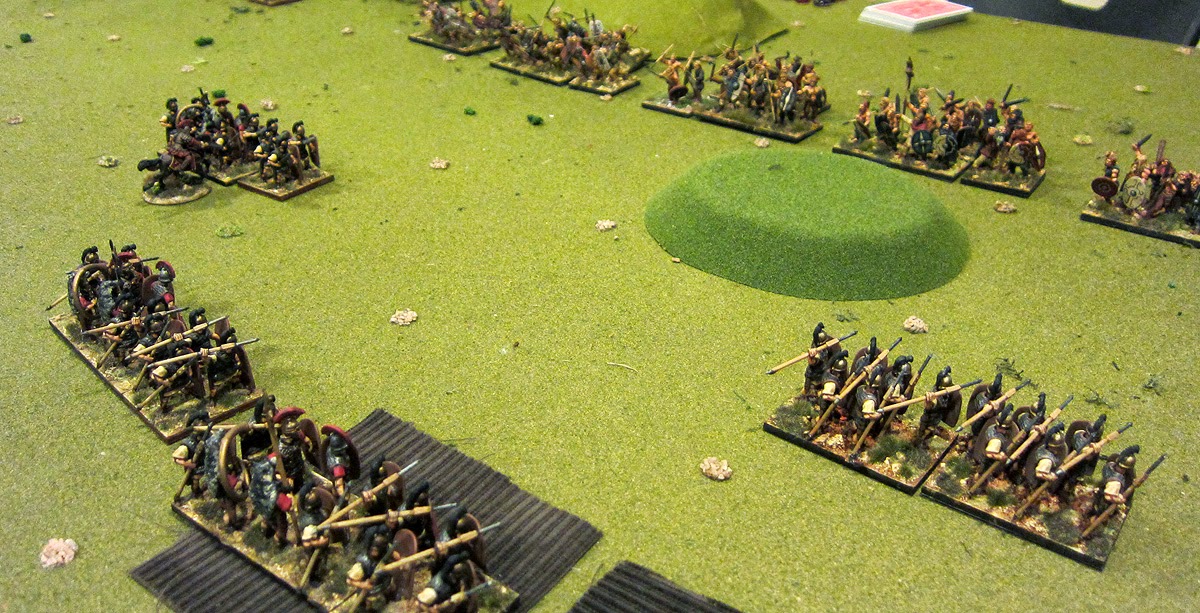
The Armies
I built a pair of point balanced armies, a Roman all infantry army with two generals and a Celt army with one general, a unit of slingers and unit of cavalry. Pretty simple, but I didn't want to get too complicated for our first outing.
Each army has a number of victory tokens based on the value of the units in their army. Each time they lose a unit, general or baggage they lose a certain number of victory tokens as well. Once the army is out of tokens it's shattered and they rout. Game over for them, while the victors head back to camp with spoils from the battle.


The Battle
As the Celt general I took the first turn, slowly putting the rules I'd read into practice. To activate a unit, I drew a card from my army's deck (a standard 52 card playing card deck, minus any face cards or jokers). As long as the card was a 2 or higher, the unit was activated and able to move one "box" forward (cavalry can move a bit farther). There aren't any specific phases, so when I activated my slingers I was able to conduct missile fire with them, needing to draw a ranged attack card and hoping to beat a 7 (the threshold for a ranged attack). Units that were already activated could be activated again, but rather than beating a 2 to do so, a subsequent activation needed to beat the card previously used to activate it.By the end of my first turn we were totally comfortable with the activation method.
 |
| It doesn't look like much, but that slightly raised hillock was going to be a choice defensive position. |
My celts headed forward, hoping to take a small hill on their left to provide some defensive bonuses before the Romans hit their line.
My wife and son each took command of one wing of the Roman army. They likewise found the activation fairly simple, but as we were still getting used to assigning generals and using their "reroll" to redraw poor activations, the Roman line advanced raggedly.
 |
| Romans advancing, but getting a bit strung out. |
In response my Celts took the hill, ready to meet the inevitable Roman charge.


In the Celt center I attached my general to a key unit and charged an overeager Roman unit that had advanced in front of its brethren. Despite repeated activations and attacks, I was unable to inflict much damage on my Roman adversary.

The Romans counter attacked, but bravery doesn't win battles alone. They failed to inflict any damage on their Celtic opponents, and in my warband's counterattacks I managed to damage the Roman line.
 |
| Celt warband inflicting a hit on a Roman unit. |

With the Roman attack on the my flank faltering they focused their efforts on the Celt center, attacking the unit my general was attached to. Their attack succeeded, so both my unit and general had to make saves. We were only two turns in, but already this was an incredibly tense and exciting game. Each card pulled was a nailbiter, so when my warband pulled a 10 and easily succeeded it's saving throw my Roman opponents were visibly crestfallen. Next my general had to make a save, needing anything but an Ace.


Dead. My wife and son reacted:

Guys. People were hoisted into the air. Much celebrating. Primal howls of victory. We play a lot of games, and I'm not sure I've ever seen such a spontaneous outpouring of emotion. "Huh," I thought, "this is a pretty good game."
The Romans failed their next activation, so I was certain I could take advantage of their faltering line before they could capitalize on my leaderless situation. I drew my first activation:
 |
| First activation draw of my turn... ugh. |
Oh dear. Two aces in a row. Initiative passed back to the Romans and things were suddenly not looking good for the hairy barbarians.

The Romans discussed their plans, prioritizing rallying their faltering lines and then concentrating on breaking the celt center. Their flank was still weakened, but their renewed attack damaged the Celtic line.
 |
| The Romans fill the gaps in their line, placing generals where they'll do the most good. |
After regaining initiative I evaluated my situation. I had managed to defeat a unit on each of the flanks of the Roman line, but without a general to help rally my center I realized I needed to crush the Romans now, or they'd wear down my center with their two generals "reroll" abilities.
I used my slingers to whittle away another Roman unit and concentrated the rest of my activations on the cavalry I'd held in reserve, advancing, turning and preparing to smash the Roman flank.
 |
| Cavalry dashing up the Roman flank |
 |
| Slingers luckily see off a Roman unit, while my cavalry turns to prepare a charge. |
The Romans gained the initiative again, and as I feared, pounded the celtic center. My line began to waver but my warbands held on, clinging to their last hit points.
 |
| Tilted figure stands indicating wavering warbands. |
Regaining the initiative I sent my cavalry and remaining Celtic flank into the weakened Roman left. My attack succeeded in destroying multiple Roman units, costing the Romans the last of their victory tokens.
 |
| The Celt center is battered, but the warband on the right is in the process of rolling up the flank. |
Final Thoughts
This game was fun, and it moved like lightning. Each card draw was tense, and because there was less time spent measuring and moving stands, there was more game time actually agonizing over decisions. I was initially skeptical of the both the grid and the use of cards, fearing it would make the whole game look too artificial, but while "in the moment" both features seemed to melt into the background and didn't bother me at all.One thing I didn't expect was the impact tilting figure stands to show damage would lend authenticity to the game. I'm used to games like Hail Caesar and Crossfire which use small dice or markers to indicate the worsening "health" of a unit. With "To the Strongest", the individual stands making up a unit are tilted slightly or moved apart to indicate a damaged unit. At a glance I could quickly determine where a line was weakening because it literally looked like it was falling apart. Neat!
I know we botched some rules, but I was surprised at how quickly everything became second nature to us. The digital rule book and it's extensive internal links is also phenomenal, quickly letting me find relevant rules without breaking the flow of the game.
We all enjoyed "To the Strongest" and we're looking forward to playing again.
Thanks for posting- it's good to see a report of a game in progress.
ReplyDeleteHi John, what a terrific-looking game! I'm really glad you enjoyed it, and as far as I can see you did pretty much everything fine. The Roman General might possibly have been wounded; there is a chart you can check on. Also the Celts can have heroes, which give them a bit more "poke" in their initial charges, but that is something for a second or third game. Best Simon
ReplyDeleteOh, right! The severity of the wound. Yep, we actually checked for severity and the general was indeed killed. My luck was worse than I remembered!
ReplyDeleteA top notch report, love the beautiful armies and the maps...
ReplyDeleteExcellent report. I am very curious about these rules and this is a great intro. Nothing like a battle report to see how it flows. Thanks.
ReplyDeleteThe best thing to do when you find yourself in a hurting or vulnerable place is to surround yourself with
ReplyDeletethe strongest, finest, most positive people you know.
See the link below for more info.
#strongest
www.ufgop.org
Very readable and enjoyable report. Thanks for doing this.
ReplyDelete