
Materials
- White (PVA) Glue
- Sand (I picked up a lifetime supply of playground sand from the hardware store. I'm considering sifting out the largest grains or finding a finer grain source)
- Cheap Paint. I use three shades of Americana craft paint: Raw Sienna, Spicy Mustard and Sand.

Technique
After gluing the figure to its base and waiting for it to dry, I start by coating the base liberally with white glue.
To level out the difference in height between the figures cast base and the wood base I put a lot of glue around the edge of the cast base and spread a thinner layer around the figure's feet.

While the glue is wet shove it in a box of sand. Shake off the excess.

Check to make sure no extra bits of sand are glued to the figures feet.

Let the glue dry overnight.
Painting
Paint the sand base with Raw Sienna/Medium Brown. The paint helps affix the sand to the base, so coat it thoroughly.

After the base dries, I drybrush with a 50/50 mix of Raw Sienna and Spicy Mustard. For bases depicting arid regions I use more Spicy Mustard, or add a second light drybrush of Spicy Mustard.
I add a final light drybrush of 50/50 Raw Sienna and Sand, just trying to pick out the sharp edges of stones and give the base a general dusting of light color.

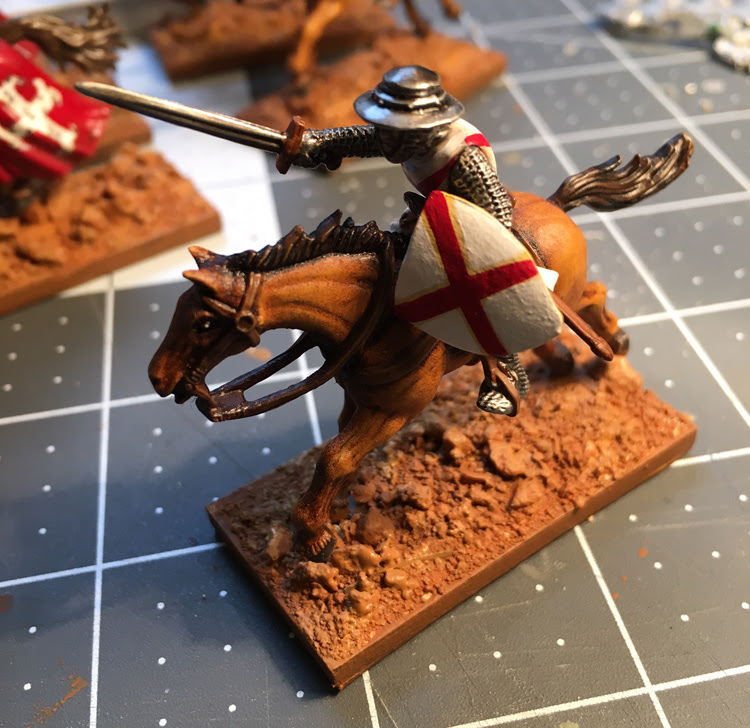
I also start working in some of the basing colors into the parts of the figure close to the grown. Here I drybrushed the bottom of the horse covering with the mix of Sand and Raw Sienna to represent dried mud or dust.

Ground Cover
The drybrush coat isn't wet for long, so after I finish painting a batch of bases I quickly move into ground cover. I spread a few lines of white/PVA glue onto the base, and use a toothpick to work it into cracks and crevices. I aim to leave about 50% of the ground untouched by glue (I like the contrast between ground cover and bare earth). For arid regions I'd cover 25% or so.

Next I choose a few Tufts

Finally I dab pinches of static grass

And that's it! I final coat of matte overcoat and the figure is ready for battle!

This is almost exactly the way I do mine. The only point of divergence is that I do a second coat of 50/50 PVA and water over the sand to set it in place.
ReplyDeleteI do mine slightly differently. Firstly, after gluing the figure to the base I use filler around the edge of the figures plastic base to even out the gap. Secondly, after gluing sand I then undercoat the figure + base. I prefer to do it this way around and the undercoat helps to secure the sand. I do like your choice of colours though, especially for arid areas. Most of my northern armies have burnt umber, with progressive highlights of tan and sand.
ReplyDeletePerfect! Thank you!
ReplyDeleteNice tips - thanks :)
ReplyDeleteI need to find an easier/cheaper method for mine....