

I've been upgrading my terrain scenics lately: woods, buildings, walls and other items that sit on top of the table, but I've been holding out on updating the terrain board or cloth that our miniature wargames are played on. I toyed with the idea of creating terrain boards, but after seeing some impressive terrain cloth tutorials (Of Metal Men's, Jeff Knudsen's Terrain Cloth and Balagan's Felt Cloth for example), I decided to tackle one myself as part of my Flocktober projects. Hurricane Sandy and Fall-In delayed completion, but pics and a tutorial after the jump.
I was wary of jumping right into a costly "rolling farmland" flocked terrain cloth without a little experience under my belt. I have some sci fi games I wanted to dust off and figured I could use a desert wasteland terrain cloth for them. Plus, sand is cheaper than grass flock.
Materials
I used the paint shades suggested in Quindia Studios awesome desert terrain board tutorial, namely Scorched Brown, Bestial Brown, Bleached Bone and gray. As described in the Quindia Studios article I brought in paint samples to the local DIY store which they matched then and provided water based acrylics in "sample" pints. Very easy and very cheap.
I also picked up a 5'x5' canvas dropcloth and some bathtub calk in various shades of brown, tan and cream. I had to resupply during this project, so here's a full list of the materials I ended up using:
- 1 canvas drop cloth ($7)
- 5 pints of paint ($2.50 each)
- 4 tubes of calk ($6 each)
- 1/3 bag of sand
- calk gun, wide paint brushes, palette knife, mixing tray and gray paint I had on hand.
Initial Terrain Cloth Sand Base
I spread the cloth on my work table and got to the business of spreading the tan calk and smearing it into a thin layer with a palette knife (I later switched to using my finger for tricky spots which seemed to work better).

I sprinkled the wet calk with sand and then used one of the other calk tubes as a rolling pin to smooth out the sand and make sure it had a firm bond with the calk.


After the entire table was covered in sand and calk, I waited for it to dry overnight before removing all excess sand.
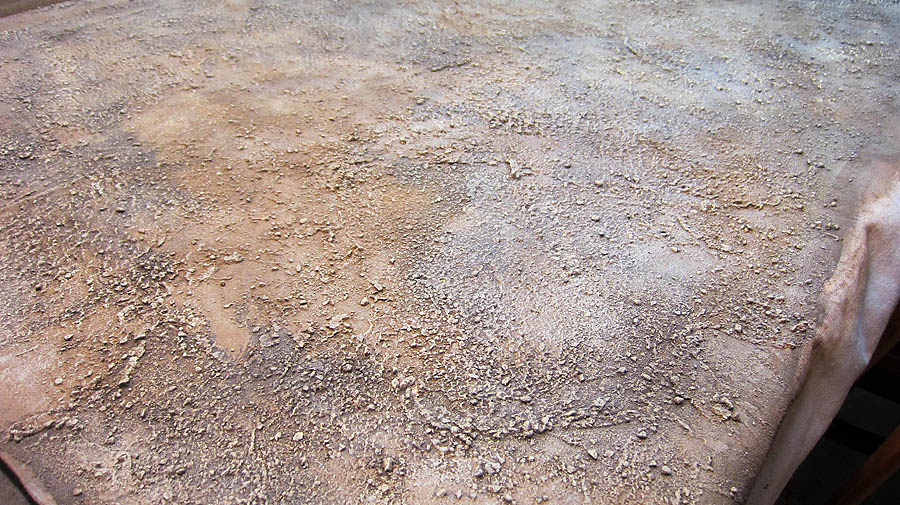
 |
| Completed sand layer |
Painting the Terrain Cloth

Next I used a heavy layer of scorched earth and bubonic brown as the base paint, mixing and blending colored patches to give the terrain cloth a natural variation. At one point I was running low on paint and began using a diluted solution of paint and water as a "wash", which looked great even when dry, but wound up not providing the extra fixing strength that a proper coat of paint did. I wound up going back and giving a few coats of paint to the entire cloth to ensure full coverage and to get into tricky area.
 |
| Base coat of scorched earth and bubonic brown. |
I tried a number of different calk colors, including a lighter tan calk to match the light sand color I had in mind for the table, but this ended up being a poor choice. I thought a dark brown would look too "wet" for an arid cloth if it showed up where the sand had worn off, but the light tan calk I chose really draws the eye when it peeks through crevices in the sand. If I did this again I'd stick with a dark brown calk for the entire mat.
Drybrushing
After allowing the base to color to dry and went back and drybrushed with various shades of bubonic brown, gray and bleached bone. |
| Beginning the gray drybrush on the left side. |
 |
| Completed drybrush |
 |
| Overhead view with a few test pieces to show scale. |
I'm happy with the final terrain cloth and looking forward to getting some games played on it. Placing foam hills beneath the cloth allows it to fold and bend into realistic hill contours. We already put it to use with our Halloween game just before it was completed and it worked really well. One word of warning, the amount of sand and calk on this table makes it heavier than I expected. I fear a larger 9x5 cloth is going to be a pain to move by one person if it uses the same sand and calk method as described above.
There are a few other additional terrain pieces I'd like to make to match this terrain cloth such as the rock formations in these tutorials: Chicago Wargamers Rock Formations and Baueda's Desert Terrain tutorial
UPDATE! Check it out, the desert terrain rolls up and stores with no damage.
Nice! I may try this to make one for western and another for my Strange Aeons games.
ReplyDeleteOh my god, this looks awesome!
ReplyDeleteThat looks fantastic! I've gotta make me one of these!
ReplyDeleteThanks all! It's not too hard, and I'd love to see pics if you end up making one of these :)
ReplyDeleteWow - that's a great technique
ReplyDeleteIt beats my wooden sectional terrain pieces hands down
Miles
Bloody lovely!
ReplyDeleteLooks great! Nice work!
ReplyDeleteThanks! Glad you like it :)
ReplyDeleteJohn, that is a beautiful mat, thanks for sharing. I'm thinking about trying it. The caulk would seem to be a big expense. Do you think a heavy coat of latex house paint would work just as well as a base for the sand, or would it not offer enough grip or flexibility ?
ReplyDeleteThe latex calk is expensive, and when all is said and done I'm not sure if this method is cheaper than buying a professional mat. More experiments need to be done. :)
DeleteAs for the latex paint, that might work. I found that even with the calk and sand, the mat really required an extra layer of paint on top to stop it from shedding sand. Once that final layer was on, things seemed to stick tight though.
If you do happen to make a mat like this, please let me know! I'd be interested to see how yours turns out :)
I will certainly let you know if/when I give it a try.
DeleteJohn,
ReplyDeleteThat looks really terrific. Thanks so much for posting. A while back I tried something similar but using a mix of PVA white glue, interior filler and fine sand. I found that I liked the results, but folding the cloth lead to cracking of the filler along the folds of the cloth and we abandoned the cloth in the end as it looked quite shabby after a while. I was wondering if you had the same experience with the caulking, or whether the caulk's greater flexibility prevented this. Thanks again for such an awesome post!
I've had the desert mat has been in storage for a few months now, but I'm hoping to get it out soon. I'll post a few pics to show how it's held up to be rolled for storage. Thanks for the comments! :)
DeleteI'm curious as well to see how it has held up after being rolled up for awhile. It looks absolutely brilliant.
DeleteI know this is coming late (I just found out about your work in MiniatureWargaming.com), but I have the same question: how has the cloth held up in storage? At first I thought you meant you folded it, which didn't seem like a good idea, but then you said you rolled it. Was it a tight roll?
ReplyDeleteBest regards,
Chris Johnson
Hi Chris. The desert cloth has been rolled and in storage since we moved into our new house. I've been meaning to get it out and see how it's held up. I should be able to do that this month and post an update. Thanks!
DeleteI am going to try this. Thanks.
ReplyDeleteThat is an awesome article. I will be trying this out this weekend.
ReplyDeleteThis is a really great tutorial. I would love to do something similar because of the limited space of my apartment. I just have one question, you have a great mix of grit in the sand- what did you do for that? I can't tell if you got it from outside, of if it is along the lines of quickrete all purpose sand? Thanks!
ReplyDeleteThanks Francesco! I picked up bag of builder's sand from the garden center of my local hardware/DIY store. You might also want to look into playground sand or aquarium sand which I think is sifted to remove large pebbles and grains, and might give you a smoother texture.
DeleteVery late to the party, but to save on weight you might want to try using sawdust instead of sand? Probably end up looking the same as sand one painted?
ReplyDeleteMy two cents :)
That's a good idea! In playing, I've found the sand also tends to have clumps that make placing figures on it tricky sometimes. I think saw dust might provide a more level surface as well. I'll have to perform some experiments in the future!
DeleteThis comment has been removed by the author.
ReplyDeleteI wonder if paint and sand mixed together could be used instead of the caulk and sand.Would it be strong enough? then just paint over with the dark colours aas you suggest?
ReplyDeleteMy mat takes a lot of abuse. It's rolled and unrolled, and I'm not too gentle with it putting it into storage. The paint my adhere it to the cloth initially, but I'm not sure it would hold up to so much motion. If you give it a try though, let me know! I'd be interested in seeing the results!
DeleteI just built one of these and it turned out well. Thank you for the great tutorial. I'd love to post pictures, but that doesn't appear to be possible
ReplyDelete2022 and this is still an important resource. Thank you for this
ReplyDelete2023 and still coming back to these older posts. This site is gold for tabletop gaming. Thank you!!!
ReplyDelete