

With my Carthaginians, Spanish and new leaders painted up it was time to get them on the table and see how they'd do. With Historicon fast approaching and another friend of mine joining us at the convention this year, I wanted to give him an intro to the rules in case we were able to get into a game together. A long time 40K and fantasy player, this would be one of his first exposures to historical wargaming. All the bloody details on a very close game after the jump.
Preparations
 |
| I modified a few of the unit cards available from Inevitable Spark to help explain the game to our newbie. They worked great! |
With both Libyan spearmen and Spanish scutarii on the table we used the Carthaginian list rather than the Gallic or Early German from our previous battles. I'm slowly inching towards a pair of opposing Punic forces, but for today's match up Hannibal's warriors would be facing the legions of the Late Roman Republic. Non-historical, I know.
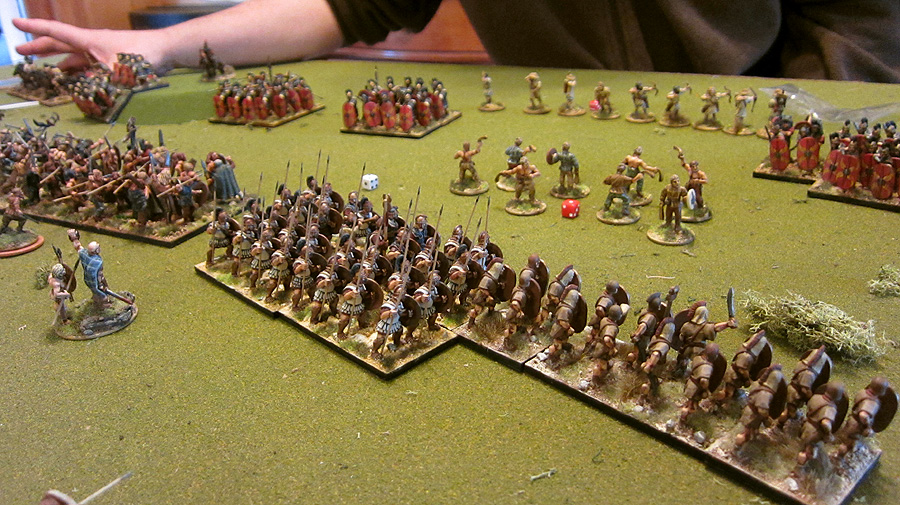
The Carthaginians were split into two divisions. I took the right, with the Libyan spearmen holding the center, supported by the Spanish scutarii. A band of celt slingers screened them, ready to fall back behind friendly lines once battle was met. A single celt warband lay in reserve behind some trees on our extreme right.
The left Carthaginian division was being run by our newbie, M.C. His three celt warbands formed our main battle line, with his medium celt cavalry on the left flank in reserve. Our plan was to hit heavy on the left, while defending our right flank.
My usual opponent Mike took the Romans, but with the battle tipped in favor of the Carthaginians due to the addition of several new units he fell into a defensive position. His six legions formed up in testudo, four of them on a pair of hills on his left and right. He held his center with the infamous Cretan archers, who have yet to last more than a turn on the battlefield. His small group of Numidian cavalry held his right flank, facing off against the celt cavalry across the field.

The Battle Begins
The Carthaginians began by moving cautiously forward. The most efficient manner of doing this would have been for the army commander to give an order to both divisions, but we refrained from doing so to allow M.C a chance to get some experience with issuing orders and rolling command dice. The celts surged forward, but my right flank lagged slightly behind. |
| Libyans and Spanish fall behind as the celts on the left flank surge forward. |
 |
| "You think we're supposed to go with them?" "Naw, little fella said "Move yer ass", but we ride horse, not donkey." |
The celt slingers exchanged missile fire with the opposing Cretan archers, but found the Roman testudo formation impervious to their attacks (the Romans normally receive a 4+ armor save on a d6. While in testudo they receive an additional +2 bonus to morale saves vs. missile fire, meaning they shrugged off any hits as long as they didn't roll a 1!)

Noticing my slingers inflict a -1 penalty to morale saves at close range (less than 6"), I decided to be a bit more aggressive. Our battle lines were approaching (the celts were now just outside of javelin range on our left. I moved the slingers up into short range to threaten the Romans, despite their cowardly turtle formation. Finally striking a blow to one of the Roman units, and having suffered a number of poor rolls in missile fire, our Roman opponent was beginning to look a bit worried. So confident were we that M.C. and I agreed to redeploy the warband from my reserve to bolster his charge on our left. Mike, realizing we'd be hammering his right flank, decided he'd need to strike now to avoid the Carthaginians picking him apart at our leisure.
 |
| Slingers move up to deliver short range bullets to those stubborn Roman noggins. |
 |
| One more shove and those Numidians would be off the table. |
The Roman Panic
Finally our celt cavalry finished sacrificing their goat, and seeing good omens in its entrails, decided to join the battle. They raced along the riverbank having rolled a triple move. In response, the Numidian cavalry countercharged. The horses met in a bloody clash, the Numidians thrown back to the rear edge of the battlefield with the celts following to maintain contact.
The celt warbands struck, but the Romans pulled out a crafty rule we hadn't used yet. Those Romans defending the hilltop used "Close Ranks" to gain a +1 to morale saves at the penalty of -1 to attacks. One Roman unit without a hill to defend countercharged his attackers. The battle lines clashed, with the barbarian hordes rolling 9 dice vs the Roman 7. The goat omens were indeed good for the celts, as very poor dice rolls continued to plague the legions. Though they hung on, the Roman right was severely bloodied, with a unit of cavalry behind their lines ready to finish off the Numidians and preparing to hit the Romans in the rear.
 |
| "Hold on fellas! We're almost there!" The celt reserve rushes to support the clashing lines. |
Desperate, Mike threw his remaining Romans into battle. With the reserve warband still making its way towards the battle on the left flank, the Romans were able to scare the celt slingers back behind the Libyan line and wrap a single unit around the flank of the Spanish.

"Guys, I think this is over," Mike observed. "Can I just concede? These frickin' dice!"
M.C. and I have a long history of losing to Mike across many, many games. "Quit yer whining," M.C. suggested, "We're going to beat you now."
From the Jaws of Victory...

The Romans had one round left. They attacked wherever they were engaged. They lost a unit in battle with the Libyans, but the Numidian horse held on, and in the great bloodbath on the left flank their luck turned. The celts, having spent their energy in the initial clash were now rolling 6 dice against the Roman 7. The Romans lost one unit, but eked out a 1 or 2 point margins of victory in the other clashes, forcing break tests for those celt units. The celt gods showed their displeasure, the 2d6 break tests turning up snake eyes. The celt left collapsed, bloodied Roman legions breaking through, rolling the line or charging into the reserve warband.
As the turn passed back the Carthaginians we counted up the broken units. An army is defeated once half of its units (not counting light cavalry or skirmishers) are broken. As it stood, the next army to lose a single unit would be defeated. With the celts on the left destroyed, it fell to the Spanish. They were engaged to their front again a Roman legion supported by the Cretan archers. Another Roman legion were attacking the Spanish flank.

We threw everything we could into the Spanish. The Libyans couldn't flank the Romans, and chasing the Cretan archers would do no good, so they stayed in support, adding their 3 dice to the Spanish. The celt slingers moved up to support the Spanish as well, giving them a grand total of 11 dice. We rolled... garbage. 1s and 2s and 3s. The Romans won the combat by a wide margin, forcing a break test at -5, which resulted in destruction for the Spanish.
Sigh.
What Did We Learn?
- Testudo really is good against missile fire. I think the testudo should require an order to switch formations in order to charge, but the rules are explicit that testudos can do everything a normal Roman unit in battle formation can.
- "Close Ranks" is great for blunting the initial warband charge.
- Libyan spearmen are awesome at defending. I probably should have had them anchor my extreme flank. That 3 dice in support are also impressive. I need some more to get them into deep pike blocks.
- Reserves are essential, not only for plugging gaps or defending flanks, but for applying pressure on weak parts of the enemy line. We haven't had enough units until now to make use of reserves but I expect that to change as I get more figures painted up.
- Coordinating two divisions without using the "army general" to issue total commands is extremely tricky. Our line started to splinter right away as the two divisions rolled different numbers of moves.
I still really dig Hail Caesar , even when I lose. As we get a greater variety and number of figures on the table more interesting tactical options and challenges crop up. Looking forward to our next game!
Fabulous battle report and a great looking game (I love your armies)!
ReplyDeleteThanks! They're coming along. Your unit cards were great! I think I'll be using for all of our games from now on.
DeleteAwesome! That is great to hear. I'll be doing Republican Romans very, very soon.
DeleteExciting game, and lovely looking armies: more, please!
ReplyDeleteThat's a great looking table and highly enjoyable report!
ReplyDeleteChristopher
That looked great! It's always nice to see someone else getting some Hail Caesar games in. I'll have to use those Testudos on Jonathan this weekend.
ReplyDeleteGreat looking game!
ReplyDeleteAnother great game, I thoroughly enjoy your reports, maps and armies.
ReplyDeleteCraig
Great battle report - Hail Caesar is a lot of fun and it's my favorite ancients rule set
ReplyDeleteMiles
Good report and discussion, thanks very much.
ReplyDeleteGreat battle report , Good.
ReplyDeleteGreat report and great looking armies. Its a great game when it all comes down to the final throw of the dice!
ReplyDeleteJust a note - Testudo really shouldn't be used outside of sieges.
ReplyDelete